AC BringUp
Make sure to have completed the bring up of the CP signaling as described in Basic BringUp.
It may be a good idea to verify the powermeter functionality now as well - even though it is not strictly necessary for charging. Please refer to BringUp Powermeter for the bring-up of the powermeter.
Once the CP signaling has been verified, most of the work for AC is done. Let’s verify the AC-specific components:
RCD
Connector Lock
You can continue to use your bringup config you used for the bring up of CP, PP and relays, which includes the BSP BringUp module.
RCD
Residual current monitoring is mandatory in most countries, but the exact regulations differ in different regions. Typically, both AC and DC residual current faults need to be detected. If the RCD is part of your charger setup (it may also be in the installation instead) it is a good idea to test it now.
Connect an RCD test device, and verify it triggers both on AC and DC faults within the correct timings and levels according to your region.
Connector Lock
A connector lock is required for AC charging in case your charging station has a socket outlet. Verify that the lock is working correctly by commanding it to lock and unlock via your BSP driver.
Milestone: First charging of a real car
Now that all individual components have been verified, it is time to assemble all pieces and charge a real car.
Start by creating a simple AC basic charging configuration file for EVerest with a minimum amount of components - e.g. with one ModBus power meter and your board support driver for CP/PP/Relays. You can set “disable_authentication: true” in the configuration of EvseManager, then no Auth manager is needed.

Copy the config file to your charger prototype. Make sure EVerest is not running as a systemd service as we will start it manually in the beginning. So in case of doubt, try to shutdown the everest system service:
systemctl stop everest
Then start EVerest with the following command:
manager /path/to/simple_ac_config.yaml
It should look similar to the following:
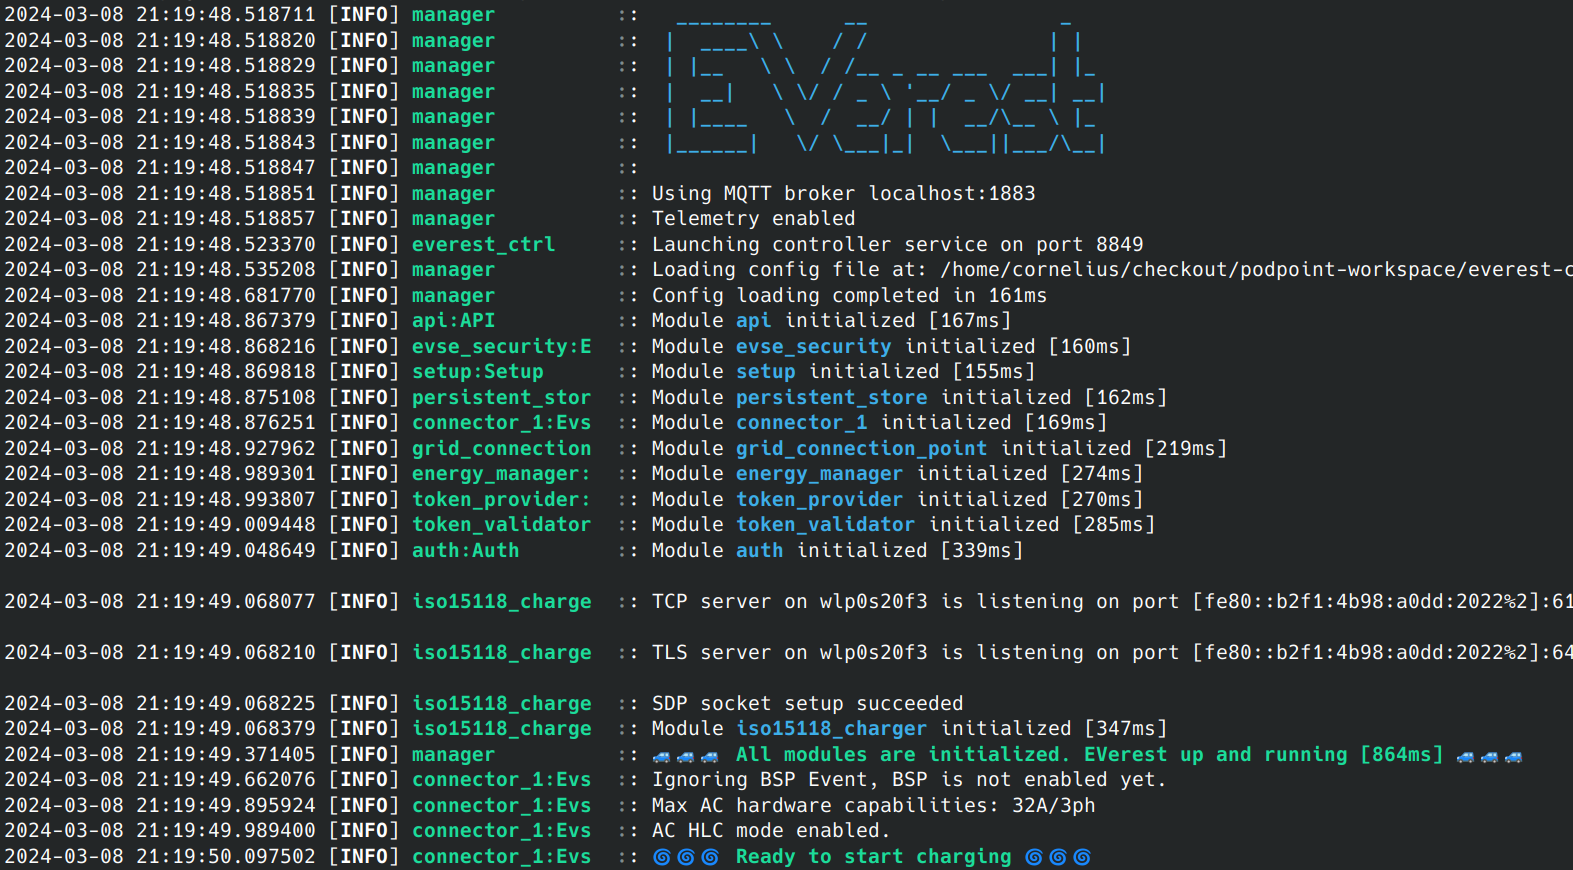
Watch out for the log line “Ready to start charging”. Once that appears, you can plug in the EV simulator.
Simulate a simple charging session by going to state B. Wait for PWM to appear, then switch to state C. The relay should click and charging should work.
Now, switch back to state B to pause charging. The relay should open and EVerest will wait in state “ChargingPausedByEV”. Go back to state C to close relay again.
Now, stop charging by first switching to state B followed by state A (unplug). PWM should stop and the relay should open.
Congratulations, you now simulated a full AC charging session on your prototype!
Two more things that should be tested before trying a real car:
Stop EVerest with Ctrl+C. Switch the EV simulator to state B and start EVerest again. Ideally, the plug-in should be detected right after “Ready for charging” and PWM should be enabled. Switch to state C after PWM is on and the relay should close.
Tip
If this does not work, your BSP driver needs to publish the current state when the “enable” command is called.
This test is important as it simulates the behavior of a power loss while a charging session is running. Especially in a home environment, it is expected that the charging continues once the grid is back.
Now you are ready to connect your first real EV. Here are a few things you should also try with real EVs:
Try pause/resume from EVSE side if you have some sort of human interface (you will need to call the pause/resume charging commands on EvseManager). If the EV supports it, also triggered by EV side.
Unplug power input to the charger while a charging session is active and replug it to verify it starts charging again (simulate grid black out).
Try different amperage limits.
Here is a (non-complete) list of things you should test as well in the full setup:
Try over-current shutdown (draw more amperage than the PWM allows, e.g. set PWM to 6 A / 10% but connect a heater to the output of the EV tester that draws much more than 6A).
Test under-/over-voltage behavior (different countries have different requirements).
Test over-/under-temperature scenarios.
EVerest BringUp for AC ISO 15118-2
If basic AC charging is fully working, it is time for the ISO 15118-2 charging bring-up. You can use a simulator for this, but unlike for basic charging, ISO 15118 simulators are quite complex and expensive. You could use a real car for this.
Note
At the time of writing, most cars do not support ISO 15118 for AC - they do so only on DC. Refer to https://github.com/EVerest/logfiles to get a better idea which car brands / models can be used for testing.
As with basic charging, we first create a new configuration file by extending the one we just used for basic charging.
We add an ISO 15118 stack as well as a SLAC module:
Start EVerest the same as we did for the basic charging test.
Now connect a real car and watch the output. Explaining the actual ISO 15118 protocol is beyond the scope of this document.
For more information on how to debug ISO communication, refer to the TODO Debug section of the documentation.
Now we have the charging functionality up and running for the most important paths.
Tip
A lot of error cases should be tested now as well as we mostly covered the happy paths - but this goes beyond the scope of this how-to-guide.
Authors: Cornelius Claussen